Helmet Camera Mount Guide for Delivery Riders 2026: Set Up for Road Evidence
Setting up a helmet camera mount correctly takes 20 minutes and lasts a season. Setting it up wrong means shaky footage that is useless in a dispute. Here is the right way.
A camera that is running but pointed at the wrong angle, or vibrating enough to blur the relevant details, is not useful documentation. The camera is only half the setup. The mount position and the installation quality are what determine whether the footage actually serves you when you need it.
This guide covers three things: where to position the camera on a delivery helmet, how to install a chin mount that lasts a full season, and how to manage the cable so it does not catch or pull loose mid-shift.
Choosing the Right Mount Position for Delivery Work
Three positions are commonly used. Each captures a different angle and serves a different purpose.
Top mount: Wide forward view from above head height. Good for content creation and scenic rides. Captures sky, road ahead, and distant traffic. Does not capture your hands, the handlebars, the restaurant door, or your face during a pickup interaction. For dispute documentation, this position is not useful.
Side mount: Captures the road and traffic to one side. Good for documenting a lane position dispute involving a vehicle on that side. Misses the forward interaction at pickup and delivery stops. Useful as a secondary camera if you are running two, not as the primary for delivery documentation.
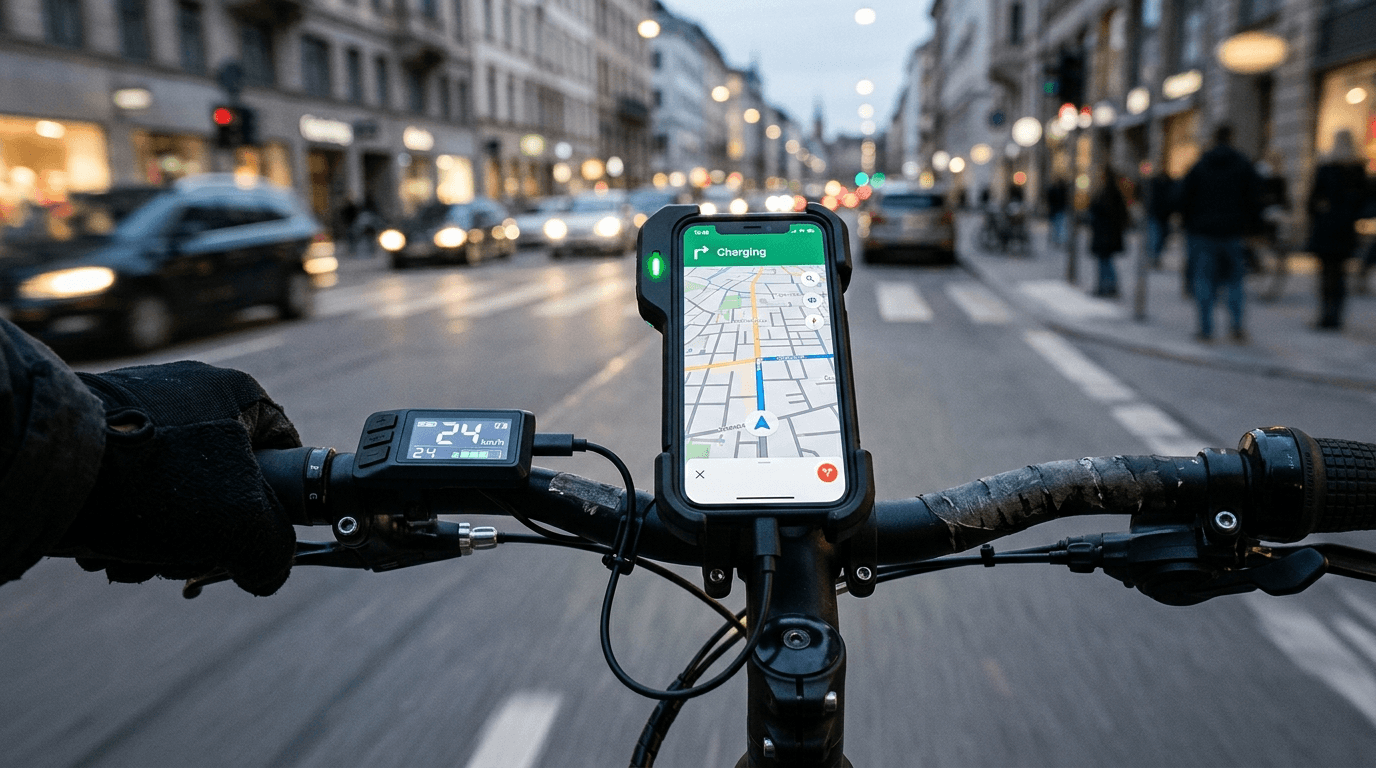
Chin mount: Angled downward at roughly 15 to 25 degrees below horizontal. Captures the forward road, both hands on the handlebars, and the scene directly in front of you at each stop. When you approach a restaurant door, the chin mount captures the sealed delivery bag and the handoff at approximately eye-witness level. When a vehicle incident occurs, the chin mount captures the forward road scene including license plates and the relative positions of both vehicles.
For delivery riders running a single camera for documentation purposes, the chin mount is the right position. Full stop.
What You Need for a Chin Mount Installation
The parts list is short.
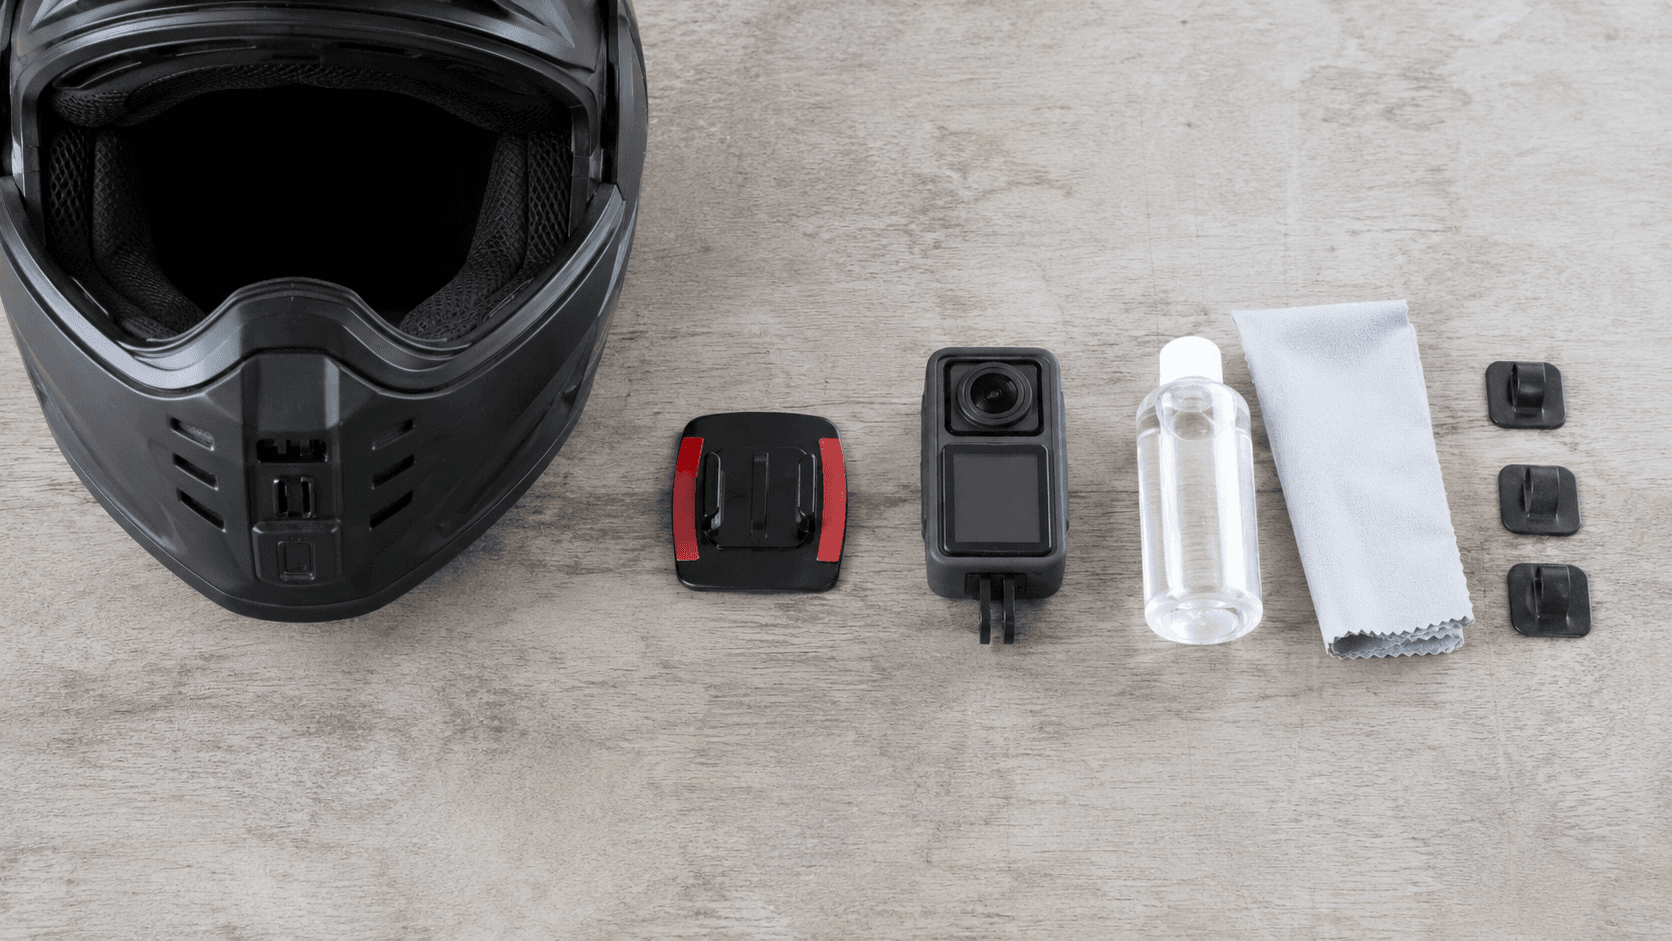
The camera: GoPro Hero 13 Black, DJI Osmo Action 5 Pro, Insta360 GO 3S, or AKASO Brave 8. The full camera selection guide is here: Best Motorcycle Helmet Camera for Delivery Riders
A chin mount adapter: Attaches to the chin bar of your helmet and provides the standard 1/4-inch or GoPro-compatible mount point for the camera. Versions for specific helmet models fit more cleanly than universal adapters. If a helmet-specific chin mount exists for your helmet model, use it.
A 64GB or 128GB SD card: Loop recording at 4K fills a 64GB card in approximately 2.5 to 3 hours. A 128GB card doubles that window. You want a card fast enough to handle 4K recording without dropped frames. UHS Speed Class 3 (U3) or Video Speed Class 30 (V30) is the minimum.
Cable clips and zip ties: 2mm to 3mm adhesive cable management clips for routing the power cable if you are powering the camera externally. A small pack costs $5 to $8.
Installing a Chin Mount: Step by Step
Step 1: Identify the chin bar geometry.
Run your hand along the underside of your helmet's chin bar. You are looking for a flat or gently curved surface wide enough for the adhesive base of your chin mount adapter. On most full-face helmets this surface is obvious. On open-face helmets there is no chin bar, so a strap-style mount that runs under the helmet is the alternative.
For full-face helmets with a curved chin bar, check whether your adapter has a convex or concave base. A flat adapter on a curved surface leaves gaps at the edges that eventually fail. An adapter designed for curved surfaces contacts fully across the base and holds longer.
Step 2: Clean the mounting surface.
Wipe the chin bar surface with isopropyl alcohol and let it fully dry before applying any adhesive. Oil, dust, and helmet coating residue all reduce adhesive bond strength. This step takes 60 seconds and doubles the lifespan of the bond. Do not skip it.
Step 3: Apply the adhesive base.
Remove the protective backing from the 3M adhesive pad on the chin mount. Press the mount firmly onto the cleaned surface and hold for 30 to 60 seconds with steady pressure. Press from the center outward to prevent air pockets.
Let the adhesive cure for a minimum of 24 hours before riding with the camera mounted. Riding the same day risks the base pulling loose under the combination of vibration and wind load before the adhesive has reached full bond strength.
Step 4: Test the camera angle before committing.
Before the first shift, sit on your bike in the riding position and check what the camera is capturing. The goal is a frame that includes both hands on the handlebars in the lower portion of the image and a clear forward road view in the upper portion. Adjust the camera angle on the mount head until this is correct. Most chin mount adapters allow the camera to tilt forward or backward by 10 to 20 degrees. Use this adjustment to dial in the framing.
Check the angle specifically at a simulated restaurant stop. Walk up to a door, hold the delivery bag at the position you would when handing it over, and verify the bag and the interaction are within the camera frame. If the angle is too high and only captures the door above the handoff point, tilt the camera slightly downward.
Step 5: Secure the camera to the mount.
Attach the camera to the mount adapter. For GoPro cameras, the standard latch connection locks with a thumbscrew. For DJI Osmo cameras, the connection uses the DJI mounting interface. For the Insta360 GO 3S, the Action Pod or the magnetic mount attaches directly.
Give the camera a firm pull test before riding. If it moves in any direction, the mount is not secure. Address the connection before the first shift.
Cable Management: Why It Matters and How to Do It
If you are powering the camera by cable rather than running on battery alone, the cable needs to be routed and secured so that it does not catch on clothing, the delivery bag, or the helmet during a pickup stop.
The routing path:
From the camera on the chin mount, the cable runs along the underside of the chin bar, around the edge of the shell, and down into the jacket collar or the bag. Use adhesive cable clips every 3 to 4 inches along the chin bar to secure the cable against the helmet surface. Clips prevent the cable from dangling freely where wind catches it at speed.
At the point where the cable leaves the helmet, it should have a small loop of slack before it runs into the jacket. That slack loop absorbs the movement of your head relative to the jacket collar without pulling taut. A taut cable pulled repeatedly by head movement will eventually pull the camera loose from the mount.
Cable choice matters:
Use a right-angle USB-C or USB-A connector at the camera end if your camera and power source support it. A right-angle connector at the camera sits flush against the camera body and reduces the lever arm that a straight connector creates against the mount.
Use the shortest cable that reaches from the power source to the camera. Excess cable length creates slack that must be managed. A 20-inch cable routed from a battery pack in a chest pocket to a chin-mounted camera is manageable. A 60-inch cable doing the same job creates three feet of excess that flaps in the wind.
If running on battery only:
No cable routing needed. Check the battery level before each shift, start the recording, and let it run. The only cable management is the SD card access for footage review and transfers.
Testing Before You Rely on the Footage
Do a full test run before the first shift where you actually need the footage.
Check the recording angle. Review footage from a 15-minute test ride and confirm the frame captures hands, handlebars, and forward road. Adjust if any element is missing.
Check loop recording is enabled. In the camera settings, confirm loop recording is active and set to a loop duration that matches your SD card capacity. If the camera records in 3-minute segments and loops at 2.5 hours, you know any footage more than 2.5 hours old is gone.
Check the SD card write speed. Record 10 minutes of 4K footage and review it for dropped frames, stuttering, or recording errors. If any appear, the SD card is too slow for your recording settings. Replace it with a U3 or V30 rated card before the first real shift.
Simulate an incident save. On the test shift, practice saving a specific clip to your phone through the camera's app. Know exactly how to do this before you need to do it quickly after a real incident. In the moment, a saved clip that took 30 seconds to find in the app is not a saved clip.
What to Do When Something Happens on a Shift
An incident has occurred. The camera was running. Here is what to do in the next 10 minutes.
Do not end the shift yet. If the shift ends and you pack up without saving, and the loop overwrites the segment before you save it, that footage is gone permanently.
Note the approximate time. Check your phone for the current time and estimate when the incident occurred. A 5-minute window around the incident time is enough to locate the right segment.
Open the camera app on your phone. Connect to the camera via Bluetooth or Wi-Fi. Navigate to the footage from the incident window. Preview the clip to confirm the relevant content is there.
Save the clip to your phone. Do this before anything else. Once it is on your phone, it is safe from the loop. From your phone, back it up to cloud storage before the shift ends.
Write a brief note immediately. Time, location, what happened, who was involved if relevant. Short and factual. This is not a legal document, it is a memory aid for when you need to recall the details later.
Camera Models and Their Chin Mount Compatibility
GoPro Hero 13 Black: Works with any GoPro-compatible chin mount. The magnetic mount system on the Hero 13 is the fastest to attach and detach. The full-frame camera body is the most visible option on the chin bar of the three listed here.
DJI Osmo Action 5 Pro: Works with DJI-specific chin mount adapters and GoPro-compatible adapters with a DJI frame or mount adapter. Slightly smaller profile than the GoPro Hero 13 on the chin bar.
Insta360 GO 3S: The smallest and lightest option at 39 grams. The magnetic mounting system allows it to sit essentially flush on the chin bar without the extended camera body profile of larger action cameras. For riders who want the most discreet possible chin mount setup, this is it.
All three cameras and their corresponding chin mount adapters are available on Amazon.
The Bottom Line
The chin mount is the right position for delivery-rider documentation. The installation takes 20 minutes done correctly. The cable routing takes 10 more minutes and prevents a month of footage loss from a cable catching on a bag strap mid-shift.
Test the angle, enable loop recording, practice the save workflow, and run it every shift from day one. The shifts where nothing happens cost you nothing. The one shift where something does happen and the footage saves your account is when it pays for every minute of setup time.